A9. Configure the floor plan🔗
In brief🔗
The floor plan lets you represent your areas and tables in PosCaisse. It serves dine-in service: the cashier can attach an order to a table, see the occupied tables, transfer an order and better track the service.
Who / when🔗
For the Admin (or an authorized employee), when installing a restaurant with dine-in service, then at each change of room, terrace or table organization.
How to access🔗
Admin → Floor plan.
Requirements🔗
🔑 Manage layout
Screen tour🔗
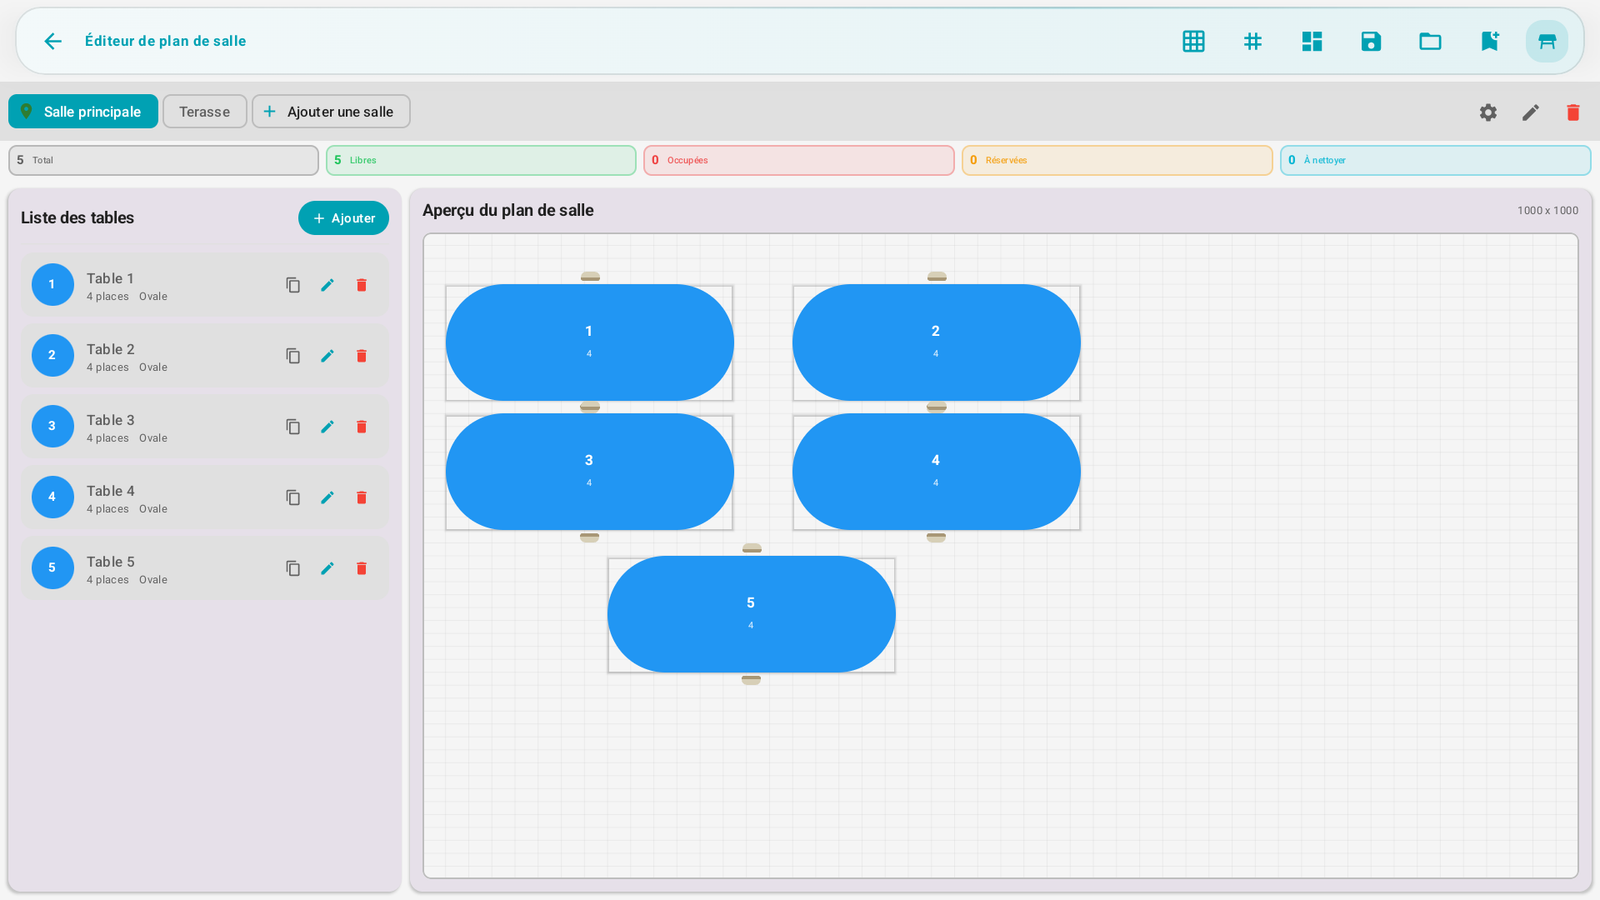
The Floor plan editor screen consists of three main areas:
| Area | Role |
|---|---|
| Room/area tabs | Choose the room, the terrace or the area to edit. |
| List of tables | Add, edit, duplicate, delete or disable a table. |
| Plan preview | Place the tables visually, move them, resize them and check the final result. |
At the top, the actions allow displaying the grid, enabling snap to grid, using templates, saving, or saving the plan as a reusable template.
Step-by-step procedures🔗
Create a room or an area🔗
- Open Admin → Floor plan.
- Tap Add a room/area.
- Give a clear name: Room, Terrace, Floor, VIP…
- Save.
Add a table🔗
- Select the relevant room.
- Tap Add a table.
- Fill in the number, the optional name, the capacity, the shape and the color.
- Place the table in the preview, then save.
Adjust the plan🔗
- Move a table directly in the preview.
- Resize it if necessary.
- Enable the grid and the alignment to get a clean plan.
- Disable a table rather than deleting it if it is temporarily unavailable.
Use the plan during the sale🔗
The plan becomes useful on the sales screen if the Floor plan widget is present in the layout (Configure the POS screen). The cashier can then choose a table, attach an order, recall an occupied table or transfer an order.
Messages & edge cases🔗
- A deleted table must no longer be used by an order in progress. If you reorganize the room during service, prefer to disable or edit after closure.
- In multi-register, the tables are data shared by the primary register. The secondary registers must therefore be correctly attached to the local network (Multi-register & network).
Tips🔗
- Keep simple names: Table 1, Table 2, Terrace 1.
- Avoid overloading the plan: the cashier must recognize the table at a glance.
- Use colors only to distinguish areas or table types, not to decorate.