B2. The POS screen day-to-day🔗
In brief🔗
The POS screen is your workstation. It was composed by the administrator (see Configure the POS screen), so its appearance may vary from one business to another. But the principle is always the same: choose products on the left/center, track the cart on the right, and take payment with the action buttons.
Who / when🔗
For the Cashier, all day long.
How to access🔗
It is the screen that appears as soon as you are logged in.
Screen tour🔗
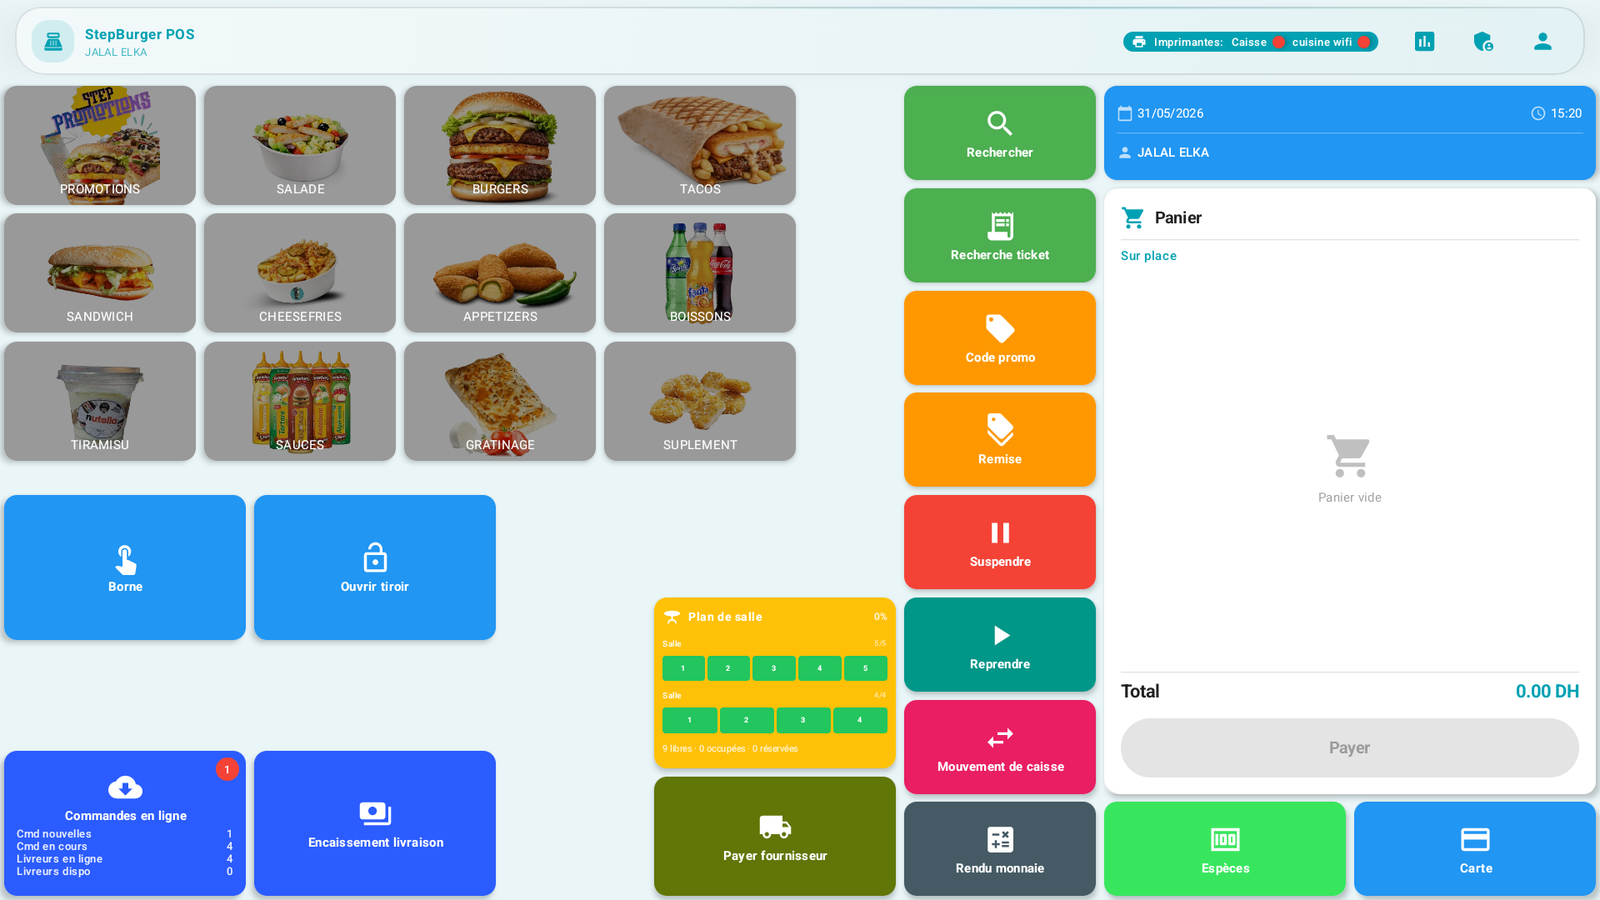
A typical POS screen consists of:
| Area | Role |
|---|---|
| Top bar | Logo, name of the logged-in cashier, date/time, status of the printers, and the Reports, Admin, Profile (logout) buttons. |
| Categories | The product families (BURGERS, SALAD, TACOS…). Tapping a category opens its products. |
| Cart (on the right) | The order in progress: items, quantities, Total, and the Pay button. |
| Action widgets | The shortcuts placed by the admin: Cash, Card, Change due, Hold, Recall, Discount, Promo code, Cash movement, Receipt search, Open drawer… |
| Floor plan / tables | (If enabled) the status of the tables and rooms. |
Your screen may be different
The administrator can place, remove or resize the widgets. If a button described in this guide does not appear on yours, it means it has not been added to your layout — ask your manager. The role of each possible widget is detailed in A7. Configure the POS screen.
First actions🔗
- Tap a category → the list of its products appears (often in a window).
- Tap a product → it is added to the cart (with a customization step if it has one).
- Track the total at the bottom of the cart.
- Take payment with Pay or directly a Cash / Card button.
Tips🔗
- The cashier name at the top confirms who is logged in: check that it is indeed you (each sale is linked to your account).
- Watch the printer status at the top: if the icon reports an error, alert your manager before the rush.