A6. Define the customizations🔗
In brief🔗
The customizations are the choices offered at the time of sale: remove an ingredient ("no onion"), add an extra ("+cheddar"), require a mandatory choice ("which sauce?") or suggest a side. They make order taking precise and increase the average cart.
Who / when🔗
For the Admin (or an authorized employee), after creating the products, when you want to offer options on all or part of the menu.
How to access🔗
Admin → Customizations.
Requirements🔗
🔑 Manage customizations
Screen tour🔗
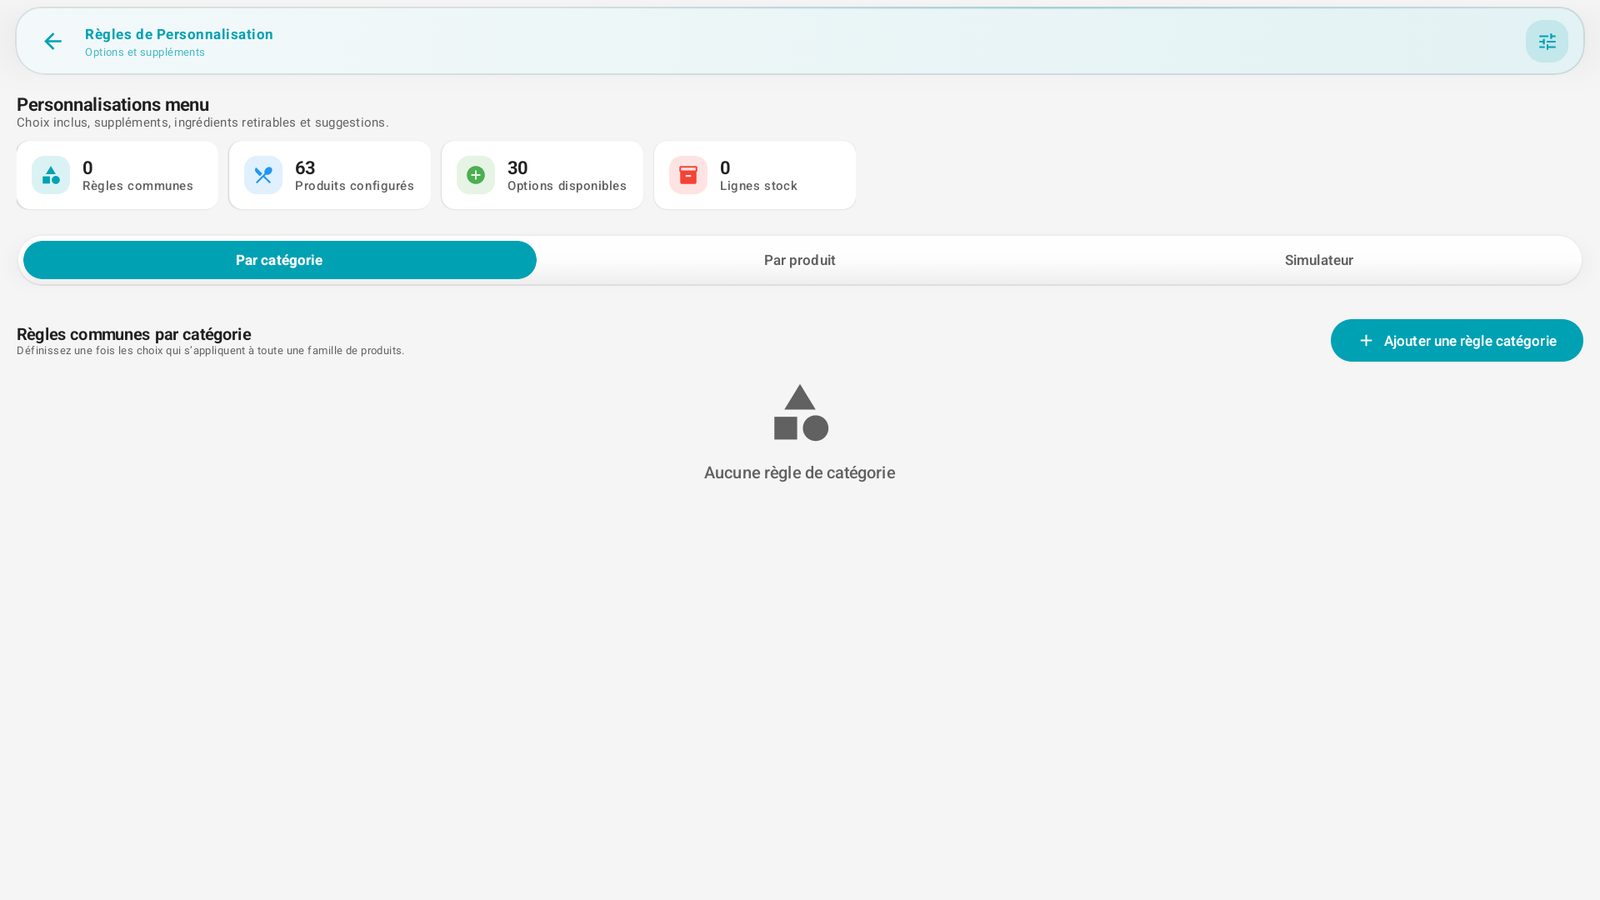
- Statistics banner: Common rules, Configured products, Available options, Stock lines.
- Three tabs:
- By category: define a rule just once for a whole product family.
- By product: define options specific to a particular product.
- Simulator: preview what the cashier/customer will see for a given product.
- + Add a category rule button (or by product depending on the tab).
Step-by-step procedures🔗
Create a common rule for a category🔗
- Open Admin → Customizations, By category tab.
- Tap + Add a category rule.
- Choose the relevant category (e.g. BURGERS).
- Define the choices: removable ingredients, paid add-ons, mandatory options (with a minimum/maximum choice), suggestions.
- Save: the rule applies automatically to all the products of the category.
Customize a specific product🔗
- By product tab.
- Select the product, add its specific options (they add to or replace the category rule).
- Save.
Test the result🔗
- Simulator tab.
- Choose a product: you see the sequence of choices exactly as at the sale.
Messages & edge cases🔗
- At the start, the screen may display "No category rule": this is normal as long as you have not created any.
- The mandatory options force the cashier to make a choice before adding the product to the cart (e.g. choose a sauce).
Tips🔗
- Favor the rules by category: you configure once and all the products of the family inherit it — much faster than product by product.
- Use the Simulator before service to check that the choices sequence as expected.