E6. Kiosk Settings🔗
In brief🔗
When no one is using it, the order kiosk displays an attract screen that invites customers to touch it to start ordering. This screen lets you fully personalize that attract screen and the kiosk theme: background, logo, media (image, video, or slideshow), call-to-action text, and colors. You work in a three-column visual editor (Canva-style) with a live preview.
Who / when🔗
For the manager personalizing the look of self-service kiosks: when setting up a kiosk, when refreshing branding (logo, colors), or to highlight a promotion on the attract screen.
How to get there🔗
System → Kiosk Settings
Prerequisites🔗
🔑 Manage settings
Screen tour🔗
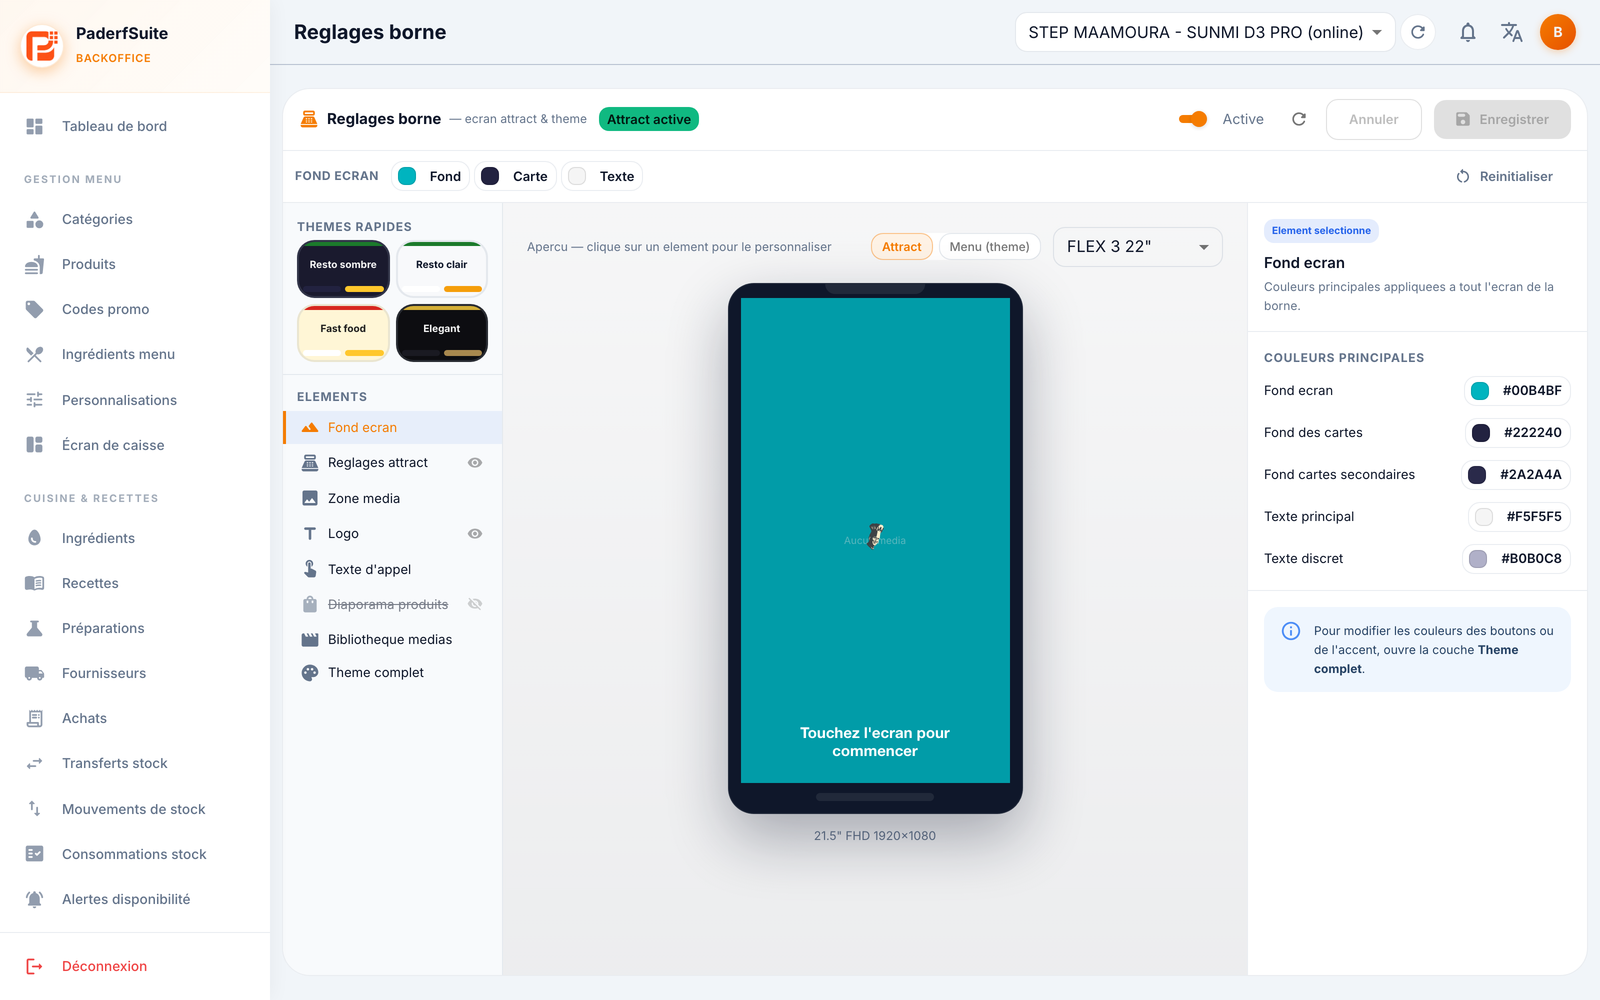
The screen is split into three columns, plus a toolbar at the top:
- Top bar: the Active status of the configuration, the Cancel and Save buttons (Save becomes active only after you change something), and the Reset button.
- Left column — layers:
- Quick themes: ready-to-use templates (Dark Resto, Light Resto, Fast food, Elegant) that apply a complete look in one click.
- Elements (layers), each with an eye icon to show/hide it: Screen background, Attract settings, Media zone, Logo, Call text, Product slideshow, Media library, Full theme.
- Center column — the preview: a kiosk mockup showing the result in real time. A menu lets you switch between the Attract preview and the Menu (theme), and pick the device model (FLEX 3, 18.5", 22", 27") to check how it renders on each screen. The size and resolution appear below the preview.
- Right column — the inspector: the settings of the selected element from the left column.
Step-by-step🔗
Apply a quick theme🔗
- In the left column, under Quick themes, click the template you want (for example Fast food).
- The preview updates immediately. Fine-tune the details afterward if needed.
- Click Save.
Set the screen background🔗
- Select the Screen background layer.
- In the inspector, adjust the main colors (screen background, card background, secondary card background, primary text, muted text).
- Save.
Choose the attract screen media🔗
- Select the Media zone layer.
- Choose the media type: image, slideshow, or video.
- Pick the visual(s) from the Media library.
- Save.
Customize the logo and call text🔗
- Select Logo to choose the image and its position.
- Select Call text to set the message ("Touch the screen to start"), its font, size, style, and position.
- Select Attract settings to define the idle delay before the attract screen appears.
- Save.
Adjust the theme colors🔗
- Select the Full theme layer.
- Set the 8 colors of the theme and check the contrast.
- Save.
Messages & edge cases🔗
- The Save button stays greyed out until you change a setting.
- To edit the button or accent colors, open the Full theme layer (the help message points you there from the Screen background layer).
- Reset returns the configuration to its default state: use it with care.
Tips🔗
- Use the device selector to confirm your attract screen stays readable across the different kiosk sizes before you save.
- A quick theme is the easiest starting point: apply one, then refine only the logo and the call text.