E3. Backup center🔗
In brief🔗
The Backup center protects your POS data: it lets you create full archives, schedule automatic backups (local, external, or cloud), produce fiscal exports, and run image maintenance. It is your safety net before any intervention.
For whom / when🔗
For the manager who wants to secure their data before an update or an intervention, set up regular backups, or produce a fiscal export for accounting.
How to get there🔗
System → Backups
Prerequisites🔗
🔑 Export data · Manage settings (for maintenance operations)
Screen tour🔗
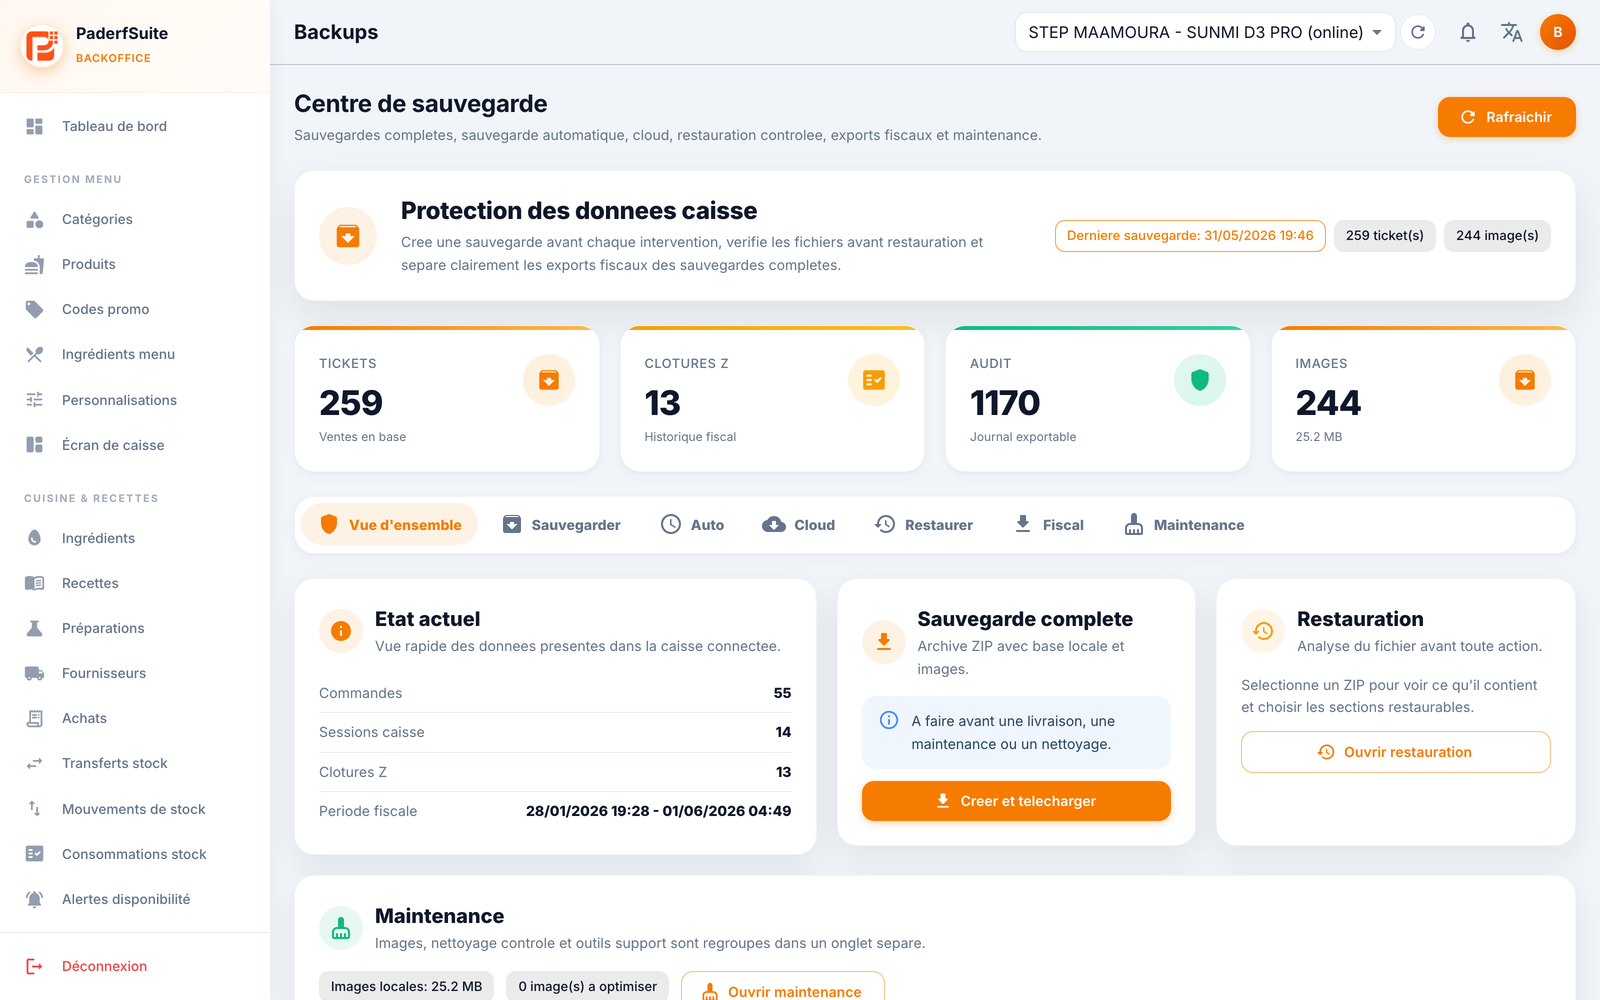
At the top, a banner reminds you to create a backup before any intervention and shows the date of the last backup. Four counters summarize the state of the data (tickets in the database, Z closures, audit entries, images). The Refresh button is at the top right. The screen offers 7 tabs.
Overview tab🔗
- Current state: a snapshot of the data present (orders, POS sessions, Z closures, fiscal period covered).
- Quick access to Full backup, Restore, and Maintenance.
Backup tab🔗
Creation of a full archive (ZIP file with the database). Create and download button.
Auto tab🔗
Scheduling of automatic backups:
- Destinations: local, external, and cloud.
- Frequency of the schedule.
Cloud tab🔗
The PaderfSuite cloud backup:
- Space used and backup retention.
- List of available encrypted backups, with download.
Sovereignty of your data
The cloud backup remains encrypted: the encryption follows that of the local database. Your data is not exposed in plain text on the cloud side.
Restore tab🔗
- Analyze a ZIP file: select an archive to view its content and choose the sections.
- Applying a restore is deliberately disabled in the interface: you can analyze an archive, but not apply it from the screen.
Fiscal tab🔗
Compliance exports: JSON, CSV, FEC, PDF, as well as an import.
Maintenance tab🔗
- Images: analyze, optimize, clean.
- Controlled cleanup before delivery, protected by a typed confirmation (NETTOYER TEST, meaning "clean test").
Step-by-step procedures🔗
Create a full backup🔗
- Open the Backup tab.
- Click Create and download.
- Keep the ZIP file in a safe place.
Schedule automatic backups🔗
- Open the Auto tab.
- Choose the destination(s) (local, external, cloud).
- Set the frequency, then save.
Review the cloud backups🔗
- Open the Cloud tab.
- Check the space and the retention.
- Download an encrypted backup from the list if needed.
Analyze a ZIP archive🔗
- Open the Restore tab.
- Select the ZIP file to analyze.
- Examine its content and the available sections.
Produce a fiscal export🔗
- Open the Fiscal tab.
- Choose the format (JSON, CSV, FEC, or PDF).
- Launch the export.
Messages & edge cases🔗
- Applying a restore is disabled by design: the screen allows analyzing an archive, not re-injecting it.
- Cloud backups are encrypted (same encryption as the local database).
- Some Maintenance operations require a typed confirmation (NETTOYER TEST, meaning "clean test", or CONFIRMER, meaning "confirm") to prevent any unintended action.
Tips🔗
- Always create a full backup before an update or an intervention.
- Enable a cloud destination on the Auto tab to keep an off-site copy, with no manual handling.