A1. Categories🔗
In short🔗
Categories organize your menu: they group products together (Burgers, Tacos, Drinks…) and determine where each group appears, both on the POS and in online ordering. This is the first building block to set up before creating products.
Who / when🔗
For the manager structuring or reorganizing the menu: when launching the restaurant, when adding a new product family, or to temporarily hide a group (for example a seasonal category).
How to get there🔗
Menu Management → Categories
Prerequisites🔗
🔑 Manage products
Screen tour🔗
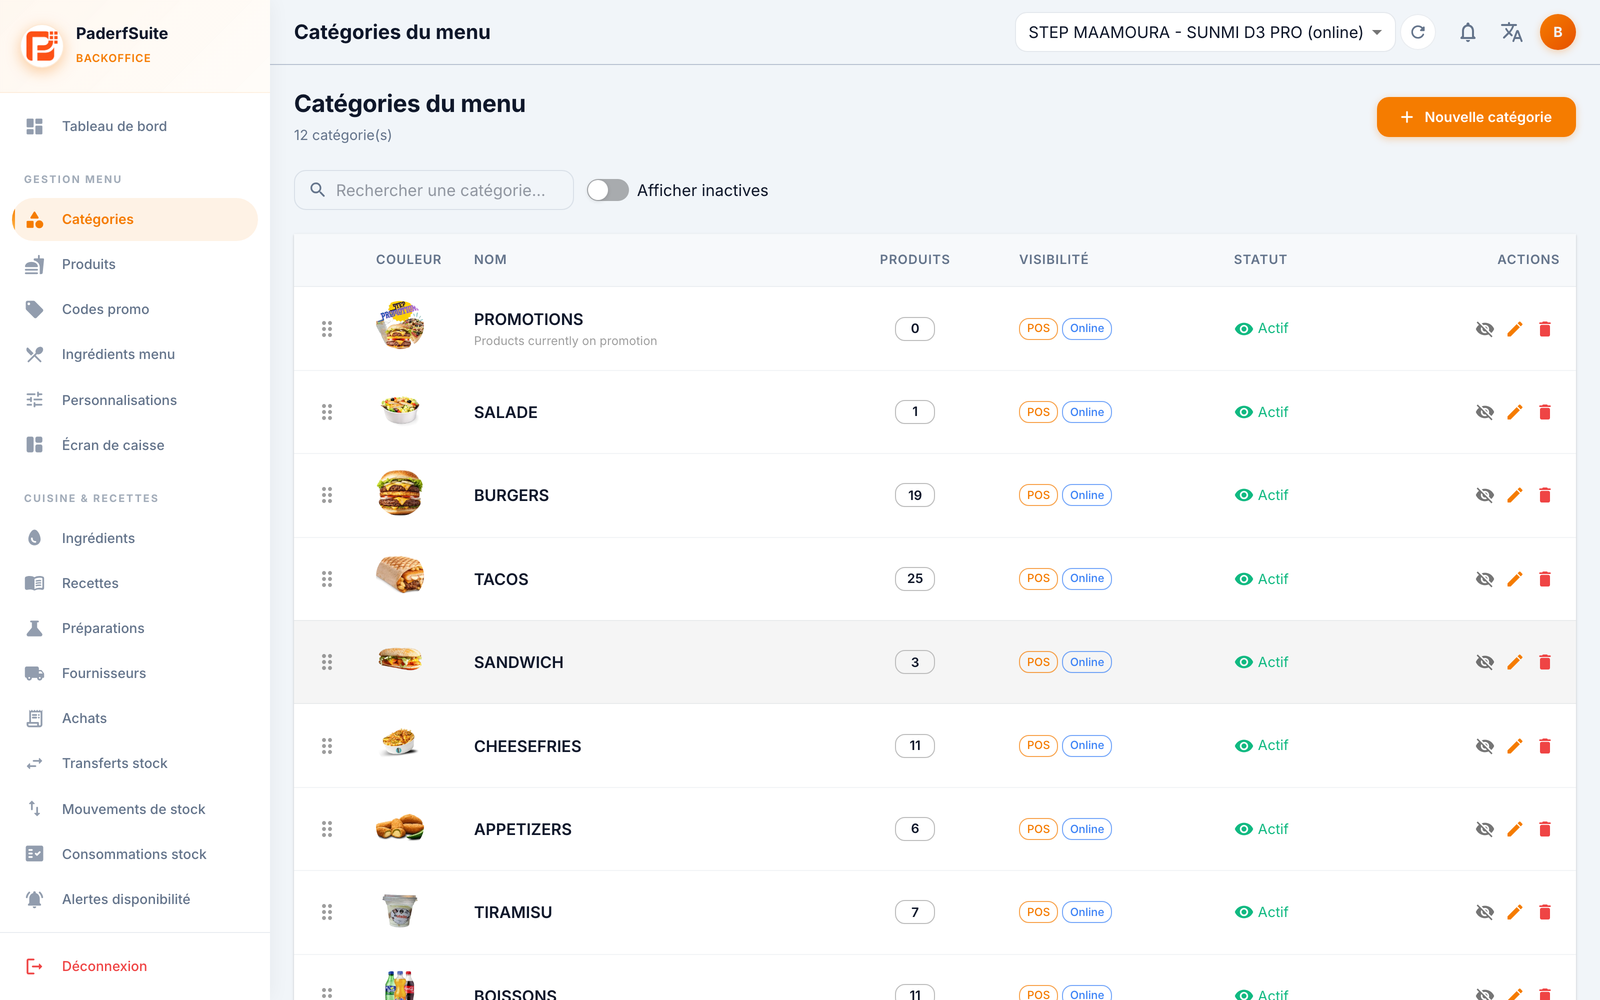
The screen shows the total number of categories, a search bar, a Show inactive toggle, and the New Category button in the top right.
The table lists categories with the following columns, in order:
- (handle): the area on the left lets you drag and drop a category to change its display order.
- Color: the thumbnail (color or image) that represents the category.
- Name: the main name, with the Arabic name and description below it when filled in.
- Products: a badge showing the number of attached products.
- Visibility: POS (register) and Online (online ordering) badges indicating where the category is visible.
- Status: Active (green) or inactive.
- Actions: hide/show, edit (pencil), and delete (trash).
The list is paginated (10, 25, or 50 rows).
Step-by-step procedures🔗
Create a category🔗
- Click New Category.
- Fill in the dialog fields:
- Name (required)
- Name (Arabic): the Arabic name (for display in Arabic)
- Description
- Image: upload a file or paste a URL; a preview appears
- Color: choose from the 12 colors offered
- Set the toggles to suit your needs:
- Active: the category can be used
- Visible on POS: it appears on the POS screen
- Visible online: it appears in online ordering
- Print to kitchen: its products are sent to the kitchen printer
- Add-on category: serves as a pool of supplements (used by customizations)
- Promotion category: groups products on promotion
- Confirm. The category appears in the list.
Edit a category🔗
- Click the pencil on the relevant row.
- Adjust the fields and toggles, then save.
Reorder🔗
Drag the handle on the left of a row up or down. The order is saved and reflected on the POS.
Delete a category🔗
- Click the trash icon.
- Confirm. If products are attached to the category, the dialog warns you.
Messages & edge cases🔗
- Deleting a category that contains products triggers a warning: remember to reassign or delete the products beforehand.
- An inactive category no longer appears on the POS or online; turn on Show inactive to find it and reactivate it.
Tips🔗
- Use color to spot your families at a glance on the POS.
- A category can be visible on the POS but hidden online (or the reverse) thanks to the two visibility toggles.