E8. Access & Permissions🔗
In brief🔗
This screen centralizes rights management: which role can do what, and which sensitive actions (discounts, refunds, cash withdrawals, etc.) are unrestricted, require a manager's approval, or are forbidden. This is where you protect your till against mistakes and abuse.
Who / when🔗
For the manager who defines how the team is organized: at go-live, when a new staff member joins, or to tighten control over risky operations (overly large discounts, abusive refunds).
How to get there🔗
System → Access & Permissions
Prerequisites🔗
🔑 Manage authorizations
Screen tour🔗
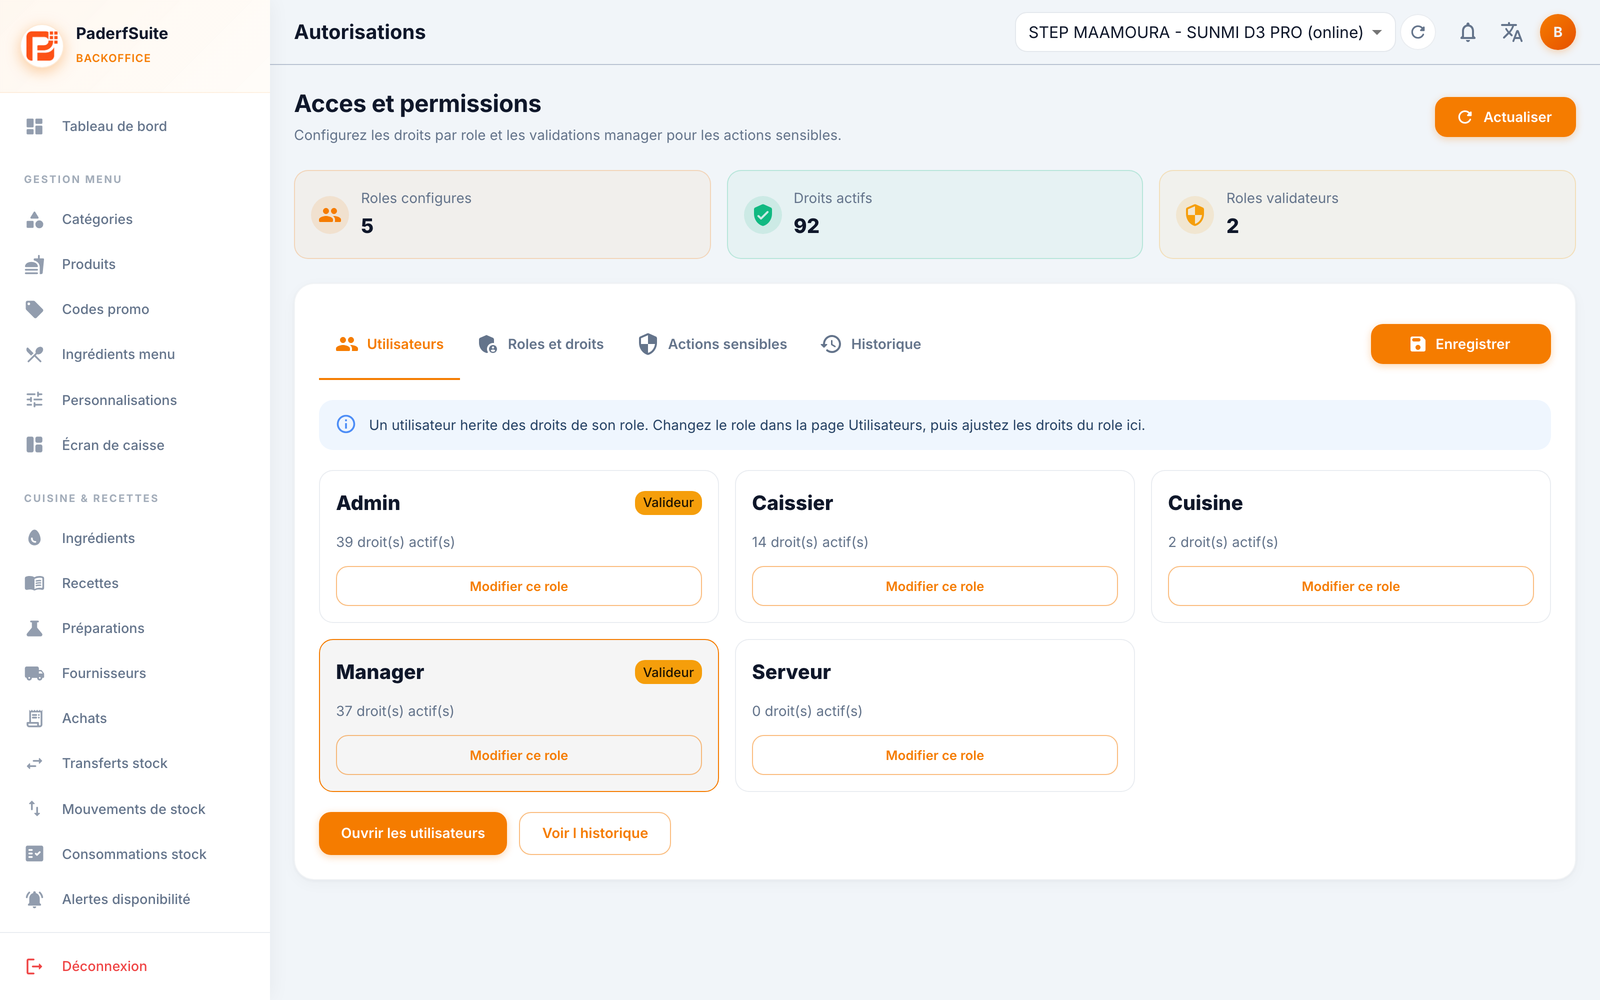
At the top, three metrics summarize the configuration (configured roles, active rights, approver roles) and a Refresh button. Below, four tabs and the Save button:
- Users: cards per role (Admin, Cashier, Kitchen, Manager, Server, etc.) showing the number of active rights and a Edit this role button. A Approver badge marks the roles allowed to approve sensitive actions. Open users and View history buttons.
- Roles and rights: for each role, the permission groups you enable or disable: Sales and till, Orders, Menu, Stock and kitchen, Reports, Administration.
- Sensitive actions: for each action, a policy among Allowed, Require approval (a manager must approve) or Forbidden. Here you also set limits: maximum discount percentage, maximum amounts for refunds, cash withdrawals, supplier payments, and accepted closing variance, as well as the ticket cancellation policy.
- History: the trail of rights changes.
Step-by-step🔗
Understand the logic: role first, then adjustment🔗
A user inherits the rights of their role. So you first choose a person's role (Users tab / Users page), then adjust that role's rights under Roles and rights.
Edit a role's rights🔗
- Open the Roles and rights tab (or click Edit this role from a card).
- Enable or disable permissions by group (Sales and till, Stock and kitchen, etc.).
- Click Save.
Govern a sensitive action🔗
- Open the Sensitive actions tab.
- For the action concerned (for example a discount), choose the policy: Allowed, Require approval, or Forbidden.
- Set the associated limit if one exists (maximum discount %, maximum amount for refunds, cash withdrawals, supplier payments, tolerated closing variance).
- Click Save.
Review the changes🔗
Open the History tab (or the View history button) to see who changed what.
Messages & edge cases🔗
- Changes are applied only after you click Save.
- Require approval means a cashier can launch the action, but an approver role must approve it. Make sure at least one role is marked Approver.
- A role with no rights at all (for example Server with 0 rights) will not be able to open any restricted screen.
Tips🔗
- Set risky operations (refund, cash withdrawal) to Require approval rather than Allowed: you stay in control without slowing down service.
- Regularly check the History tab and the Audit log to track rights changes.